Cats are inherently clean animals, but ear care may require some help even from the cleanest cat. Cleaning a cat’s ears is an essential aspect of responsible pet ownership. Regularly checking a cat’s ears can prevent wax buildup or irritation and potential ear mites or infections.
While cleaning ears does not need daily maintenance,knowing when and how to clean a cat’s ears properly helps your cat remain healthy, happy, and comfortable.
In this guide, I will explain everything you need to learn on how to clean a cat’s ears at home, from recognizing when cleaning is necessary to using the right products and methods.
Whether your cat happens to have dirty ears or you’re just keeping up with grooming, this helps prevent common mistakes and informs you if you should go to the vet instead.
Why Cleaning Your Cat’s Ears Matters
Cats are groomers by nature, but sometimes, they need a little help to maintain their ear health. Learning how to clean a cat’s ears isn’t just about making them look tidy; it’s part of caring for their health.
Dirt, wax, and moisture can all collect in your cat’s ears and lead to irritation or an ear infection if not taken care of.
If you remember to check the cat’s ears regularly and gently clean them if needed, you can avoid these issues and make sure your feline friend is always feeling their best. If you’re not familiar with cleaning a cat’s ears, don’t worry. It’s simpler than it looks when you have the right supplies and know what you’re doing.
It is also essential that you understand how often and why you should clean them at all. Regardless of whether your cat is an indoor explorer or an outdoor adventurer, ear hygiene contributes to their wellness and overall comfort.
If you see behavioral changes along with ear discomfort, it could signal a deeper health issue–check out these warning signs of a sick cat so you can act quickly.
Benefits of Grooming Your Cat
Knowing how to clean a cat’s ears is just one component of a larger grooming routine that can be beneficial to you and your kitty. Routine grooming means:
- Helps prevent ear infections due to wax, dirt, or mites
- Allows you to notice early warning signs of problems like swelling, odor, or discharge
- It forms trust, increases your bond, and gives gentle, caring handling
- It helps decrease anxiety around vet visits by getting your cat used to being touched
Grooming, which includes ear care, can additionally help you identify issues sooner before they get serious or more expensive to deal with. If you are just getting started, these cat care tips for beginner cat owners will help you feel prepared.
Particular cats rarely require ear cleaning; others (especially breeds such as Sphynx or Devon Rex) have a propensity to get lots of wax and may require more regular maintenance. And do keep in mind a well-groomed cat is a happy cat.
What Do Healthy Cat Ears Look Like?
Before learning about how to clean a cat’s ears, it might be helpful to know what is considered normal. Understanding your cat’s baseline ear condition is the first step in identifying when maintenance or cleaning is needed and helps prevent unnecessary cleaning that may irritate your cat’s ears. When in doubt, always check with your veterinarian if you’re starting a new grooming practice.
Healthy cat ears are:
- Light pink in color on the inside
- Free of dirt, debris, or discharge that you can see
- Odor-free
- Free of any redness, scabs, or swelling
A small amount of light brown ear wax is normal – unless it becomes excessive, you don’t need to worry about cleaning it. If you notice dark debris that looks like coffee grounds, a strong smell, or your cat is scratching their ears often, these can be signs of ear mites or an infection, and it would be best to reach out to your vet before doing any cleaning.
When Should You Clean a Cat’s Ears?
Knowing how to clean a cat’s ears is one thing, but knowing when to clean their ears is also important. Ear cleaning is not the same as the other essential grooming activities like fur brushing or nail trimming since ear cleaning is only needed when necessary.
Cats typically offer excellent self-grooming, so their ears most often stay clean without your intervention. However, there are certain situations when it is called for to help your cat with their ear hygiene.
Cleaning too much or over-cleaning can irritate while leaving a dirty ear could lead to infection, discomfort, or something more serious.
To find the balance, you have to pay attention to how your cat behaves and the condition of your cat’s ears.
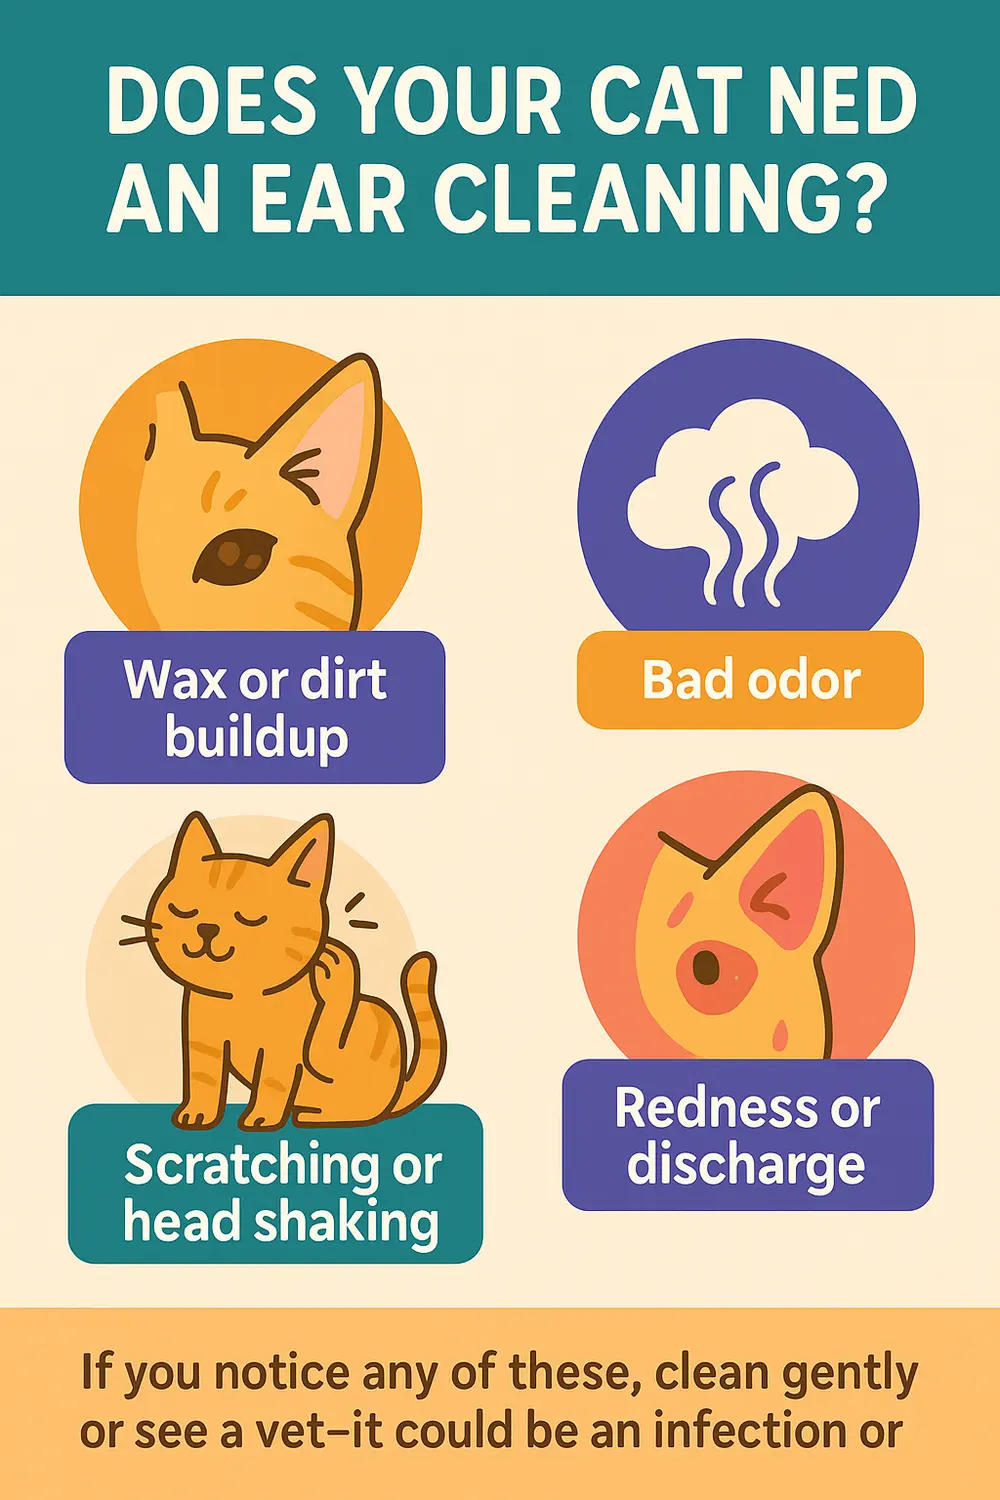
How Do You Know If Your Cat’s Ears Need Cleaning?
These are all indications that your cat may need a simple ear cleaning or even a trip to the vet. If your cat has clean, pale pink, odorless ears, it is best to leave them alone.
Most of the time, cats do not need regular ear cleaning unless there is a problem.
If you want to know how to clean a cat’s ears properly, you first need to identify the occasion of doing so. Check your cat’s ears if:
- There is a dark wax or debris buildup in the ear canal.
- There is a foul or yeasty smell coming from the ears.
- Your cat is scratching, shaking, or tilting its head more than usual.
- There are signs of redness, swelling, or discharge of the ear opening.
Cleaning Kitten Ears: What You Should Know
Kittens can be prone to ear issues like ear mites, especially if they come from shelters or you rescue them from the outdoors. They tend to have smaller and more sensitive ears and give extra attention to their care.
If your kitten has black debris, excessive amounts of wax, or is excessively scratching its ears, reach out to your veterinarian about how to safely clean a kitten’s ears.
Always use a gentle ear cleaner recommended by your veterinarian and soft cotton pads or balls. Avoid using cotton swabs, as they could harm a kitten’s sensitive ear canal.
Recommended Frequency for Cleaning Your Cat’s Ears
If your veterinarian has suggested regular ear cleaning because of chronic wax accumulation or the risk of infection, follow their instructions and only have your cat’s ears cleaned as needed.
Over-cleaning will only impede the natural defenses of the ear. There is no set rule regarding how often to clean a cat’s ears. Best living conditions, breed, health, and lifestyle are all factors:
- Indoor cats usually only need a monthly ear check and may need to be cleaned rarely.
- Outdoor cats can require a more frequent inspection because being outdoors can expose them to dirt and moisture enough to make their ears prone to infections and exposure to parasites.
- Breeds like the Sphinx or the Devon Rex, being hairless or have oily skin, generally produce more wax and may require cleaning every 2-3 weeks.
In short, knowing how to clean a cat’s ears includes knowing when you should clean them. You should routinely check your cat’s ears for signs of buildup or irritation and contact your vet if you are unsure.
Minor issues can be caught early through a proactive approach, helping keep your cat happy and healthy and purring comfortably.
What You’ll Need to Clean a Cat’s Ears
Before you start learning how to clean a cat’s ears, having the appropriate tools and products can make the experience safer, smoother, and more comfortable for you and your kitty. You don’t need any fancy gadgets for ear cleaning. You need the right essentials and a gentle approach.
Recommended Ear Cleaning Solutions
The very first step to effectively cleaning your cat’s ears starts with using a safe, veterinarian-approved ear cleaner. Do not use human products; cats have delicate ear canals that require products specific to their anatomy! Look for an ear cleaner that is:
- Alcohol-free and non-irritating
- pH-balanced for use on felines
- Which breaks down wax and debris
Recommended veterinary products include:
- Virbac Epi-Otic Advanced Ear Cleanser– a trusted, safe option for routine cleaning.
- Zymox Ear Cleaner– contains enzymes to treat minor irritations, as well as treat buildup.
- Oxyfresh Pet Ear Cleaner– odorless, non-toxic, and soothing.
- TrizULTRA + Keto is a medication for cats with recurrent infections, but only under a veterinarian’s supervision.
Do not start a new routine or ear cleaning without consulting your veterinarian first, especially if your cat has had ear issues in the past.
For safe and correct cleaning, ensure that you use the right cat grooming products, ideally those recommended by your veterinarian.
What Not to Use (Hydrogen Peroxide, Alcohol, etc.)
While considering how to clean a cat’s ears, it is also essential to understand what you should not use. Stick to pet-friendly solutions and avoid probing too far into the ear. When you have the steps mastered, a simple wipe with a soft cotton ball on the outside is all the cleaning that your cat needs when done correctly.
Everyday pet-care solutions can easily do more harm than good:
- Hydrogen peroxide may be a good disinfectant, but it isn’t enjoyable to the sensitive tissues of the cat’s ear.
- Alcohol-based solutions can be very painful to a cat and dry the ear canal, leaving the cat in discomfort.
- Vinegar or astringent (like witch hazel) can be too irritating and damage the ear’s skin or make the infection worse.
- Cotton swabs (Q-tips) are a huge no; a Q-tip can easily push material deeper into the ear or damage the eardrum.
Tools to Have on Hand
Establishing a calm, comforting space will set you up for a simple ear cleaning. Here are some must-have utensils: Have your tool kit close by and ready before you begin. A little preparation can make your cleaning routine much safer and smoother.
| Tool | Purpose |
| Soft towel | Wrap your cat snugly to restrain them gently. |
| Cotton balls/gauze | deal for wiping away debris, never use swabs inside the ear canal. |
| Vet-approved solution | Apply inside the ear to loosen wax and dirt buildup. |
| Treats | Offer before, during, and after cleaning for positive reinforcement. |
| Helper | Having a second person hold or soothe your cat can make the process easier. |
How to Clean a Cat’s Ears – Step-by-Step
Every cat parent should know how to clean their cat’s ears. Cats are good at grooming themselves but often miss their ears and clean them with greater difficulty.
Regular ear cleaning can clean dirt and wax buildup but also prevent serious ear infections and ear mite infestations. With the right approach, the right supplies, and a lot of patience, ear cleaning can be a positive experience for you and your cat.
Here’s a comprehensive, vet-recommended guide to safely and confidently clean your cat’s ears.
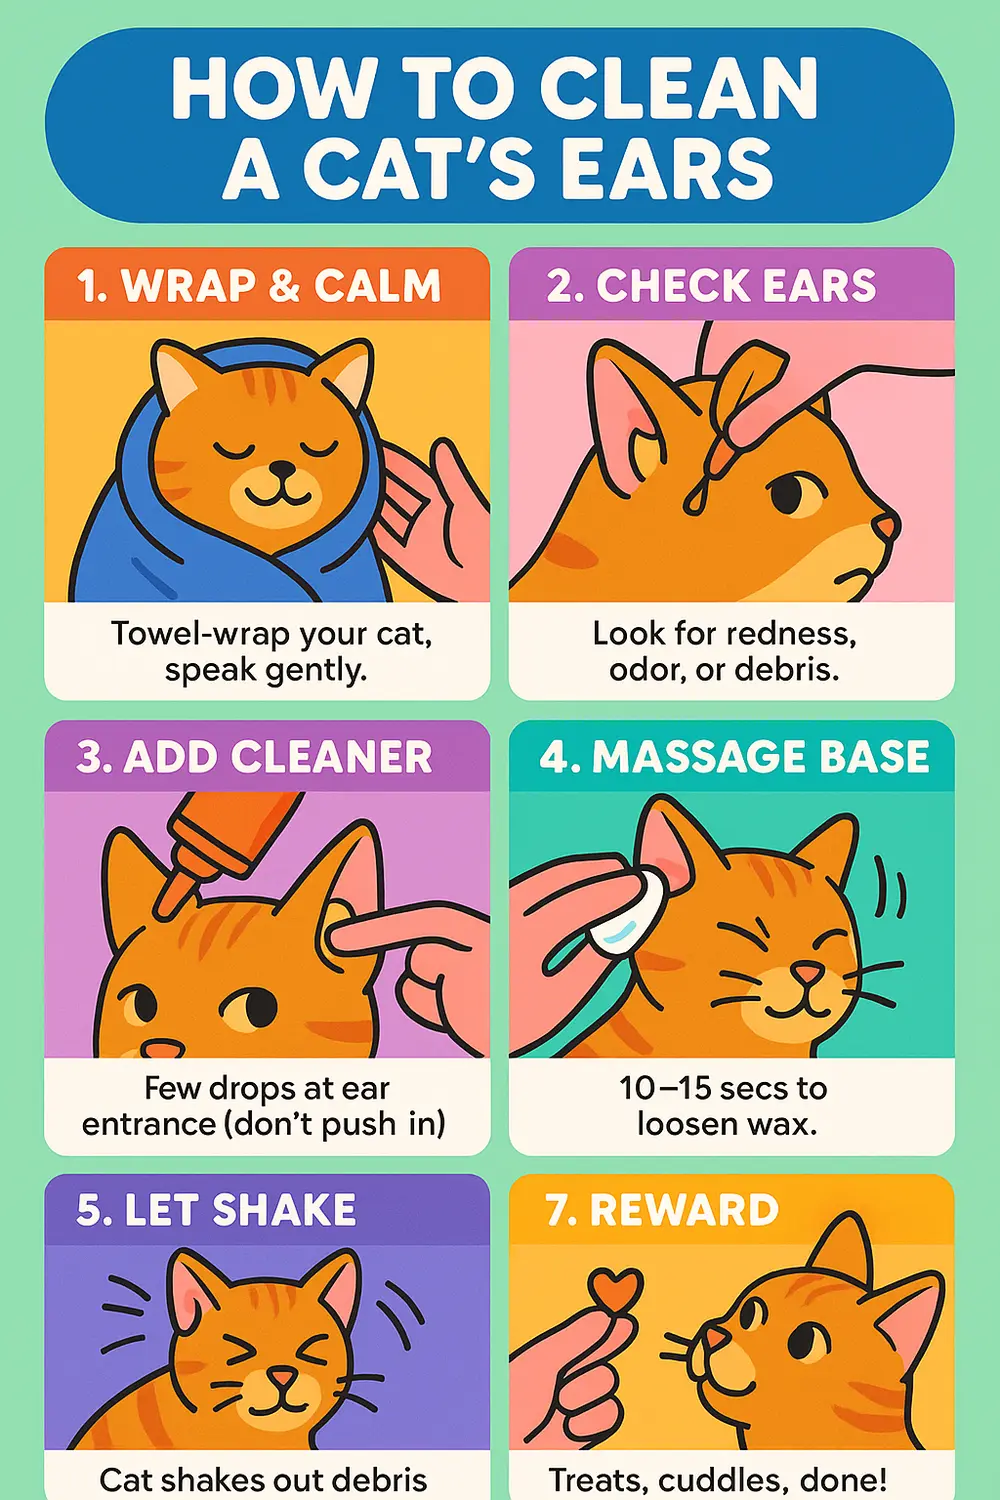
Calm and Secure Your Cat
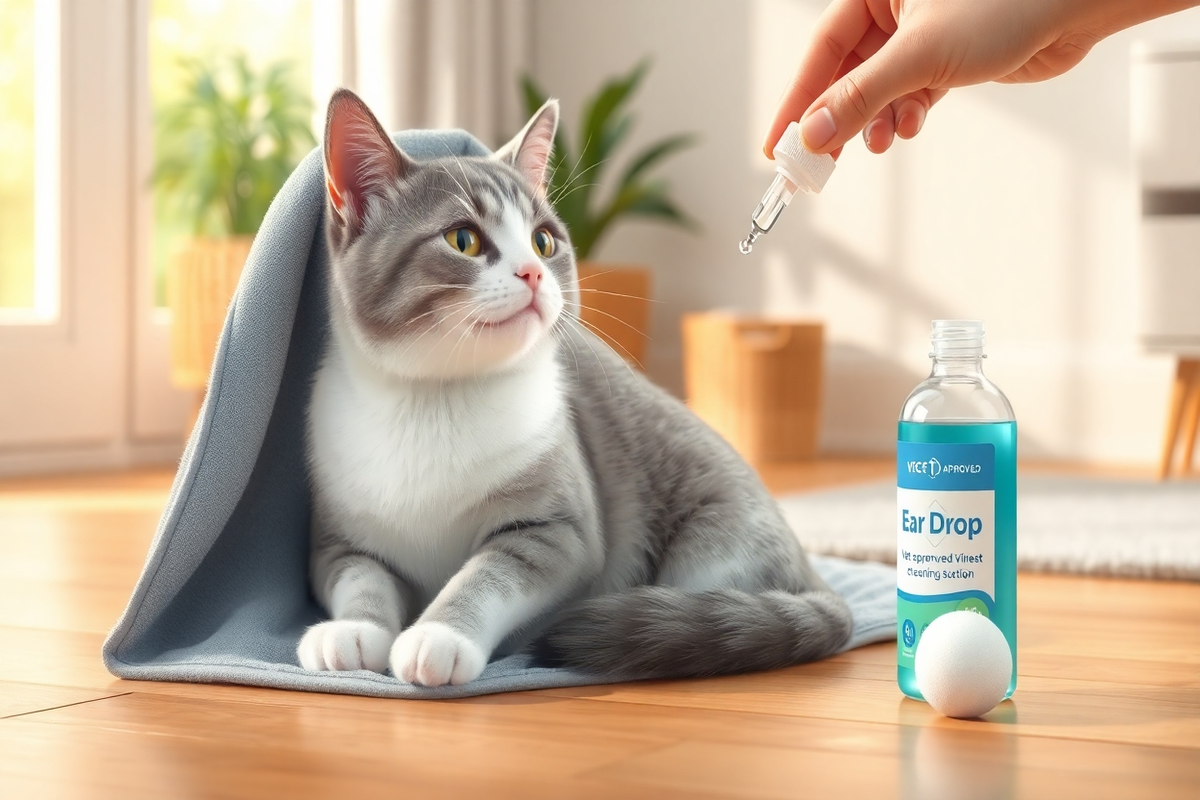
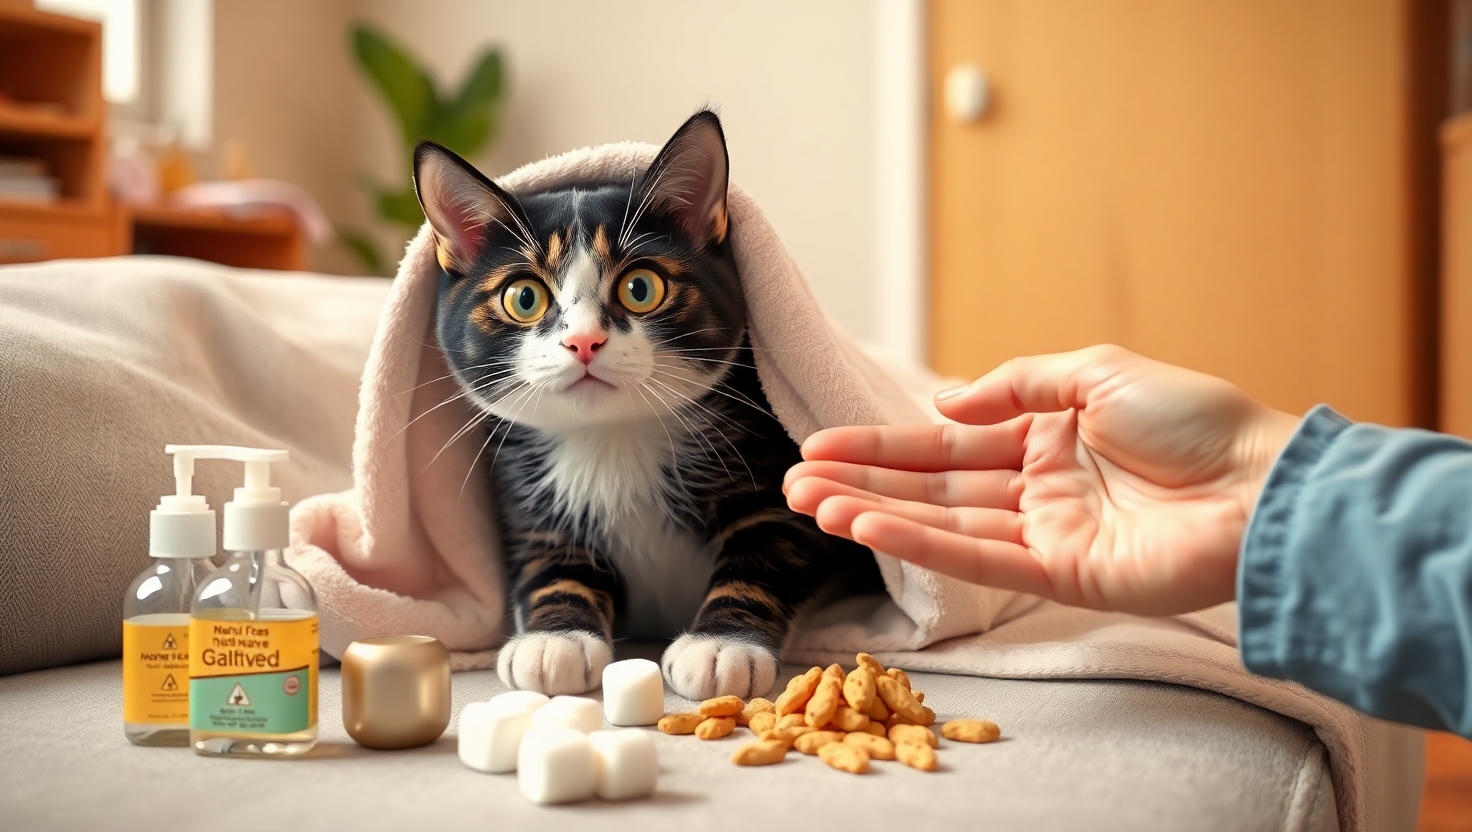
First, create a safe and calm environment for your cat. Start in a quiet, little room where your cat won’t be able to run and hide. Wrap your cat in a soft towel (imagine a “purrito”) to limit sudden movements while making it feel more secure.
Use a quiet voice and a light touch. If your cat is overly anxious, stop for now or try again later. You can also try calming pheromone sprays or other treats designed to relieve feline stress. A good time to do this is to play with your cat so it can get out its energy or clean them soon after a meal when they are more relaxed.
Check your Cat’s Ears for Wax or Infection
Before using any solution, look closely at both ear canals. Healthy cat ears are pale pink, not loaded with wax, odor-free, and have no shows of swelling or redness.
Look for:
- Brown or black wax (may indicate ear mites)
- Strong odor or yellowish discharge (may indicate infection)
- Scratches, swelling, or tenderness (may indicate inflammation)
If you see any of these signs, do not clean the ear – get the vet first. Cleaning infected ears with infection can lead to more irritation.
Using the Cat Ear Cleaner Without Risk
When your cat is calm, and the ears look clear of infection, gently lift the ear flap to expose the ear canal. Use a veterinarian-approved cat ear cleaning solution and insert the nozzle just inside the ear canal; never push it down deep into the canal.
Apply enough of the solution to fill the canal; if some run out during this process, don’t worry! Just keep the ear upright to allow the liquid to flow deeper into the canal.
Always follow the dosage your vet instructs or the directions provided on the label. Too much or too little dosage will result in an ineffective cleaning.
Massage the Ear Base Gently
After applying the ear-cleaning solution, rub the base of the ear in a circular motion for 10 to 15 seconds. This movement will help pull compounds away from the deeper direction of the ear, allowing the ear cleaner to break up debris and wax even deeper.
If the ear cleaner is working, you will hear a soft squishing sound; that’s the ear cleaner working its way through the wax and debris. This step is essential to loosen the debris so that your cat can shake it out. Be sure to perform the massage; it’s one of the most helpful portions of the process.
Allow Your Cat to Shake Their Head
Release your cat, allowing them the chance to shake their head. This instinctual behavior helps to dislodge debris formed inside the ear canal and bring it to the surface.
This section may be a bit messy, so be ready with a towel or prepared to be in an easy-to-clean area. Head shaking is a good thing; it means the solution is working to remove unwanted accumulation.
Wipe Away Excess Fluid and Debris
Using a clean cotton ball, makeup pad, or soft tissue (never a cotton swab or Q-tip), gently wipe the outer areas of the ear and the visible part of the ear canal.
Do not put anything inside the ear canal, as that can cause damage or push debris in deeper. You are only trying to clean what is visible and accessible. Make sure to throw away each cotton ball after each use to avoid returning debris back or bacteria.
Rewarding Your Cat with Treats and Praise
Don’t forget to reward your cat for cooperating! Give your cat their favorite treats, lots of praise, or extra playtime immediately after following the cleaning process. You want to create a positive association with the cleaning process.
In time, your cat might become more tolerant of ear cleaning, and some cats may even learn to accept ear cleaning because it is a part of their grooming routine.
With a bit of patience, the correct supplies, and a gentle approach, cleaning your cat’s ears can be an easy part of cat care. Regular ear inspections and ear cleaning will help your cat be more comfortable and can also help you identify any situations that could turn into significant problems.
If you have any qualms during ear cleaning or if your cat shows any signs of discomfort, infection, or pain, consult your vet.
Cleaning Cat Ears with Special Conditions
Cleaning your cat’s ears occasionally is essential, but when there is a specific problem, like ear mites or another condition, there is a special way to clean the ears. If your cat is scratching his ears a lot, shaking his head constantly, or you see dark material that almost looks like coffee grounds inside his ears, then your cat has a common problem: ear mites.
That is why, in such cases, you need to be a little more particular when cleaning ears because you do not want to make a bad situation worse while being in with the clean ears concept.
Let’s go over how to clean a cat’s ears when you have ear mites and when it’s time to call in medicated treatment.
How to Clean the Ears of a Cat That Has Ear Mites
Ear mites are tiny little parasites that live in the ear canal of your cat. These parasites eat wax and the oil on the skin.
Ear mites are very contagious from pet to pet. They can cause significant itching and redness, promoting scratching, which leads to dark, crumbly debris. If left untreated, the ear mites can cause a secondary bacterial or yeast infection.
If your veterinarian has confirmed ear mites in your feline, here is a method to clean ears safely before medication:
- Gently restrain your cat by using a towel in case of sudden movements.
- Use whatever your vet prescribes cat-cleaner that is safe for ears with mite irritation.
- Use the cleaner per the steps outlined in the step-by-step guide, but take extra caution to avoid causing more discomfort to your cat.
- Wipe off only what is visible in the ear with a cotton ball or soft cotton pad–do not go digging, as there may already be sensitivity in the area.
- Allow your cat to shake its head; this may help with bringing the debris and mites to the top.
Cleaning without harming your cat can also assist with the treatment working better. It is just cleaning, and ear mites in the cat’s ear will not get killed from cleaning. You need medicated drops for that.
Discover how to identify and address ear mites in cats so your pet can remain comfortable and healthy.
Medicated Drops and When to Use Them
Your veterinarian may prescribe medicated ear drops to treat ear mites or an infection they cause after cleaning. These drops will usually contain anti-parasitic ingredients such as selamectin, ivermectin, or milbemycin that target the mites where they live.
These are the things you need to understand to use medicated drops properly:
- Always apply the drops just as directed- overuse can lead to irritation to the ear, and underuse will not resolve the issue altogether.
- Once you have cleaned the ear, carefully place the drops into the canal until they fill the brim, massage the base of the ear, and allow your cat to shake. Do not disturb your cat until they shake out the excess fluid.
- Continue treatment for the full course, even if symptoms resolve earlier, as this helps to prevent a recurrence.
- Do not use over-the-counter mite treatments without consulting your veterinarian, as not all products will be safe or effective.
If your cat tends to get ear mites regularly, there are a couple of preventative steps to take. Periodically checking your cat’s ear for dirt and debris, as well as regular cleaning and preventive treatment such as monthly parasite control if necessary, are helpful in avoiding future outbreaks.
Learning to clean a cat’s ears properly under any condition will lessen your cat’s discomfort and allow for
faster healing. Whether your cat has mites, infections, or wax buildup, the cleaning you give your cat, along with the treatment, is essential for ear health.
Common Mistakes to Avoid When Cleaning Cat Ears
Learning how to clean a cat’s ears is an excellent skill for pet parents, but if you do it incorrectly, things may occur that can be worse than not cleaning the ears at all. Be careful of these common mistakes that can harm your furry friend’s ears, and keep them safe, healthy, and irritation-free.
Using Hydrogen Peroxide
Hydrogen peroxide is a common go-to for disinfecting cuts and scrapes, but using it in your cat’s ears can be harmful to sensitive ear tissue. The bubbling from hydrogen peroxide is effective at cleaning a wound but can be damaging to the lining of your cat’s sensitive ear.
It can also dry the skin out and worsen inflammation, particularly red irritation or sores existing on the wall of the ear canal. Always use a veterinarian-approved cat ear cleaning solution for both safety and effectiveness.
Using Products with Alcohol
Many products that contain alcohol can be harsh and irritating to your cat’s ears, similar to hydrogen peroxide. Alcohol cannot only sting but can also dry out the ear canal and remove natural oils, possibly causing discomfort and potentially increasing the chance of infection.
If you don’t know what is safe to use or what it could potentially do, it is best to ask your veterinarian for the best choice with an apparent ear-cleaning solution. The best option is to use something gentle and non-stinging that your vet recommends explicitly for pets.
Overcleaning or Cleaning Too Frequently
More is not always better when it comes to ear care. If you clean your cat’s ears too often, it can lead to inflammation, disturb the ear flora, and even damage the lining of the ear canal. Most cats will require ear cleaning as infrequently as once a year in the absence of ear problems.
If your cat’s ears are clean and odor-free, cleaning them is unnecessary. Clean your cat’s ears only if you see dirt or at the request of your veterinarian.
Inserting Cotton Swabs Deep into Ear Canal
As tempting as it is to use a cotton swab to dig for deep wax or dirt, this is a definite no-no. Using swabs in your cat’s ear canal may cause pain, push debris deeper, or worse, damage the eardrum. Concentrate on gently wiping the outer ear and the part of the ear canal that is visible with a cotton ball or gauze pad. Safe technique is fundamental to learning how to clean a cat’s ears effectively without causing harm.
Why Cleaning a Cat’s Ears Can Be Difficult
Cleaning a cat’s ears may seem easy, but it can be one of the more difficult grooming experiences, especially if your cat does not feel appreciated in touching. If you recognize why this may be difficult and how you can deal with your cat’s disposition, it can make a huge difference for you when you’re learning how to clean a cat’s ears safely and without stress.
Tips for Nervous or Aggressive Cats
Many cats are high-anxiety animals or don’t like to be held, which can cause ear cleaning to be very stressful for both the animal and the owner. Angry or aggressive behavior during ear cleaning, or any grooming for that matter, usually indicates that a cat is uncomfortable, afraid, or is just not familiar with the process itself. Here are some tips that may be helpful to you:
- Pick a calm time of day when your cat is the least stimulated or is hungry, lethargic, or sleepy.
- Gently wrap your cat in a towel (sometimes referred to as a “purrito”) to restrict your cat’s paws without holding them down too hard.
- Pet your cat with gently calming tones to help reduce anxiety.
- Let your cat smell the cleaning tools before you start using them.
- Break grooming tasks into short sessions. If your cat starts to become restless, remember a little bit at a time.
- Always reward with treats and praise before, during, and after the cleaning process to help your cat associate ear cleaning with positive experiences.
These techniques can help turn what is often a very unpleasant grooming experience into a more tolerable one after time and repetition. Some cats may resist grooming due to fear, or stress levels may be high. Here are ways to calm an anxious cat before you attempt to clean your ears.
Should You Ask for Help from a Partner or Vet?
If your cat squirms, scratches, or acts defensive when you are cleaning their ear, it’s okay to ask for help from a partner or family member. One person can gently hold and comfort the cat while the other does the cleaning.
Not only is this a better safety concern, but it also makes the task easier.
But, if your cat is incredibly stressed or aggressive, or you feel unsure about the safety of cleaning your cat’s ears yourself, reach out to your veterinarian. A veterinarian can demonstrate the correct technique, and they can often clean them themselves, particularly if there are infections, ear mites, or severe buildup.
Knowing when to involve additional assistance is part of being a responsible and caring pet parent. After all, the goal is to keep your cat’s ears clean while minimizing their fear and physical harm.
When to See a Veterinarian
While being able to clean a cat’s ears at home is a valuable skill for pet owners, it’s also essential for pet owners to recognize when to seek professional assistance. Some ear issues in cats can require more than basic cleaning, and failure to obtain medical aid may lead to complications. Catching ear problems early will help keep your cat more comfortable and healthy.
Signs of Infection or Serious Problems
It is essential to closely examine your cat’s ears before beginning any ear-cleaning routine. If you notice any of the signs listed below, this may indicate an ear infection or some other serious issue that warrants a vet checkup:
- Persistent scratching or pawing at the ears
- Frequent head shaking or tilting
- Redness, swelling, or warmth in the ear or around the ear
- A dark brown or black discharge, especially something that looks like coffee grounds, i.e. ear mites
- A strong, foul smell from the ear
- Visible sores, blisters, or bleeding
- Your cat seems lethargic, cranky, or more reclusive than usual
If you notice any of these symptoms, please stop cleaning the ears yourself. It could be a sign of a cat ear infection that needs immediate veterinary attention. They will be able to diagnose the problem, treat the cat if necessary, and clean the ears safely and adequately in controlled conditions.
When DIY Cleaning Isn’t Safe
Even if you are knowledgeable about how to clean a cat’s ears properly, your cat’s safety and comfort should come first, and if there is any doubt, contact your vet. For example:
- If your cat is highly anxious, fearful, or has exhibited aggression.
- If the ear canal is obstructed or inflamed or is extremely sensitive to touch.
- If your cat has a history of ear infections or other medical conditions.
- If you aren’t sure about the cleaning method or solution, you have chosen to use it.
In these situations, it is often best to leave this to a veterinarian or a trained professional groomer to care for cat ears. Trying to clean infected or injured ears at home might cause more inflammation, damage the ear canal, or do even more serious damage, such as loss of hearing.
Final Tips for Cat Ear Care
Knowing how to clean a cat’s ears is one aspect of your kitty’s health and care. Making ear care a part of your cat’s grooming routine can allow you to identify ear care issues earlier while at the same time building trust in you and your pet. Here are some last few expert tips to make ear care simple and easy.
- Checking your cat’s ears is a good practice every week, even if you aren’t going to clean them every time.
- You should check for ear wax buildup, redness, foul odor, or scratching.
- Regular checks allow you to gauge when and how you can clean your cat’s ears safely from home before a little issue becomes a bigger health issue.
- Most cats only require cleaning once per month or as needed unless your veterinarian prescribes more frequent ear cleaning due to chronic ear problems or in cats with particular breeds.
Creating a Positive Grooming Routine
Cats are creatures of habit, and the most effective ear care happens when a cat enjoys the experience. Take your time and reward your cat with treats and lots of gentle praise at every opportunity. Use soft voices, and never try to put the cat in positions where it is uncomfortable.
When you provide a grooming experience without stress to the cat, it is more likely your cat will cooperate when you try to do ear care again in the future. By making cleaning a cat’s ears part of a loving grooming routine, you are helping your cat be healthy, as well as strengthening your companion bond.
FAQs
How much does it cost to get a cat’s ears cleaned?
In general, the cost for a vet to clean your cat’s ears ranges from $20 – $75, based on the location and severity of the condition. Regular cleanings are less expensive if done during an exam. However, many ear cleaning/removal procedures occur because of a more complex issue like an infection or mites, which can cost more due to medications or diagnostics.
What is the black stuff in my cat’s ears?
If you see some black gunk inside your cat’s ears that looks like coffee grounds, it could be ear mites or possibly dried blood from one of its many irritations, while dirt or wax buildup also occurs; remember that black debris pertains to a parasitic issue.
Never clean until a veterinarian has determined the issue. To treat ear mites, you will need a specific medication. If you learn how to clean a cat’s ears, that is good to know, but don’t use cleaning as a substitute for consulting your vet when you see these symptoms.
Can indoor cats have dirty ears?
Absolutely! Even inside, cats can have dirty ears from natural wax buildup, allergies, and/or even mild infections. In particular, hairless breeds and cats with skin conditions can generate more wax. Indoor environments are often cleaner, but you still need to routinely check your cat’s ears and clean them when necessary. Not only is learning how to clean a cat’s ears a great way to catch early signs of a problem, but it also helps maintain overall ear hygiene.
Can I put hydrogen peroxide in my cat’s ears?
No, you should not use hydrogen peroxide to clean your cat’s ears. Hydrogen peroxide can further irritate the delicate ear canal, especially if the ear is inflamed, as well as cause discomfort and damage. Remember: when cleaning ears, you should have a vet-recommended ear cleaner made especially for cats. If you are uncertain about cleaning your cat’s ears correctly, your veterinarian can help and recommend safe options.
Conclusion
Understanding how to clean a cat’s ears is a valuable but straightforward way to promote your cat’s good health. Although cats are generally excellent self-groomers, their ears may need some assistance, especially when there is wax, mites, or infection buildup.
Knowing what to look for, using the necessary tools, and developing an effective, calm grooming routine can help you make ear cleaning a stress-free experience for both you and your cat.
Just remember, gentle care and observation can go a long way. Don’t overdo it, don’t use harmful products like hydrogen peroxide or alcohol, and always ask your vet if you have questions.
A few minutes of attentiveness to those ears can prevent much bigger problems in the future, keeping your kitty purring playful and pain-free with happy cleaning.